SEO stands for Search Engine Optimization and is based on optimizing websites for search engines. Properly configured SEO options will help your site rank better (higher) in search results, such as Google.
In this article, you will learn how to optimize SEO using the options available in the platform.
Title, keywords, description, and meta tags
Add title, keywords, description, and meta tags on your landing page:
1. Log in to your Landingi account and go to the editor of your landing page.
2. You will find SEO options and add meta tags in the Page Settings section.
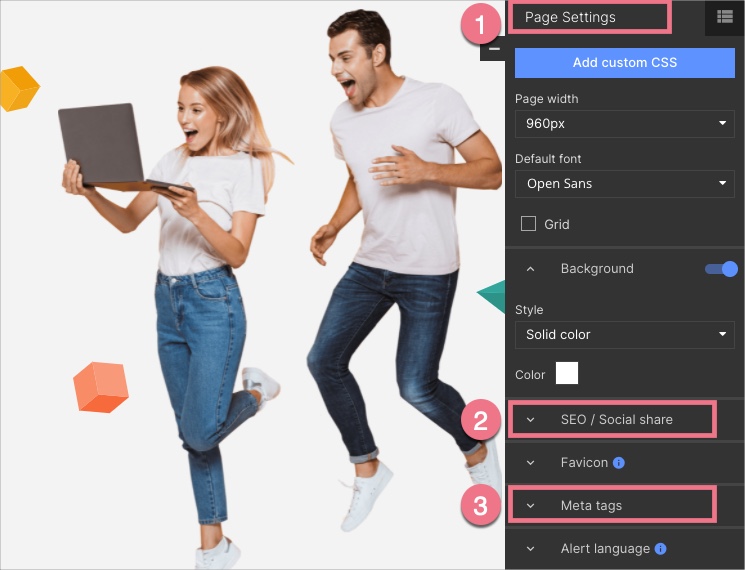
When editing, you can go back to Page Settings by clicking on the arrow:

Title, keywords, and description
- The title is displayed in search engine results and the browser tab.
- Keywords briefly summarize the content of the entire landing page and help crawlers find relevant websites that match users’ queries. Separate keywords with commas.
- The description is a longer text that will appear in the search engine results below your landing page title.


Meta tags
Meta tags contain useful information about the content of your landing page and support your marketing activity. Some meta tags have a significant impact on how your page ranks in search results.
In Page Settings, you can add your own meta tags to your landing page that are necessary when you need to verify your page:
- read how to verify your domain for Google via Google Search Console;
- read how to verify your domain for Facebook via Facebook Business Manager.
Once you’ve completed the configuration, publish the landing page again.

Social share
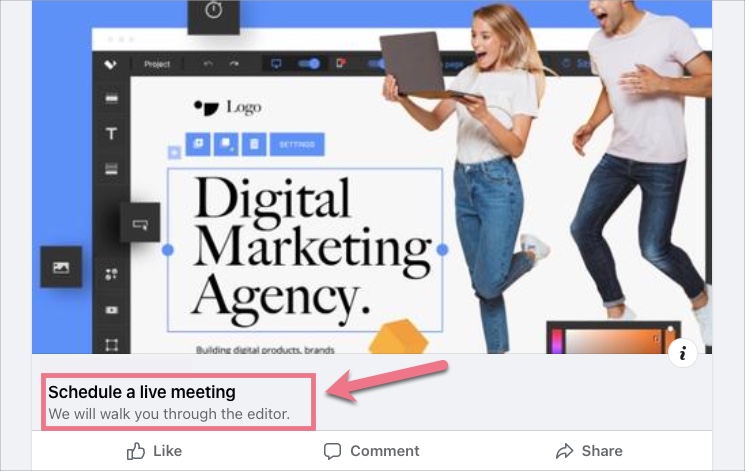
When you share your page on social platforms, users see the page title, description, and thumbnail (some platforms do not display all elements). Keep in mind that not all platforms update thumbnails automatically.
Learn how to add an OG image (thumbnail) on your social media platforms:
Title and description for sharing
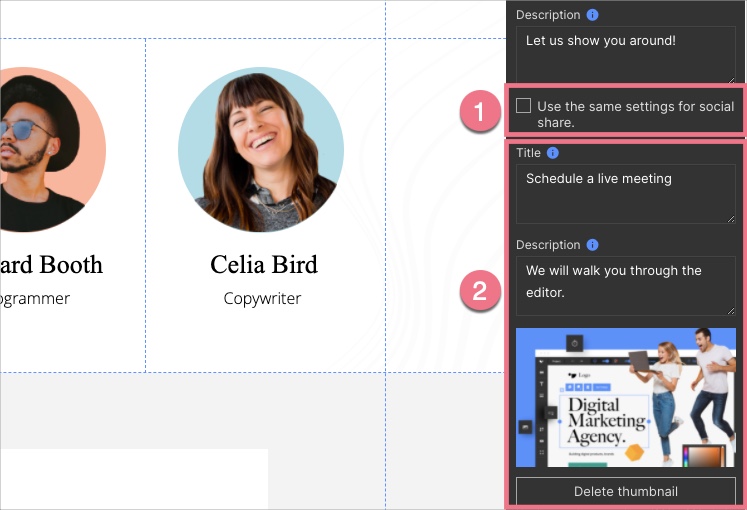
You can select Use the settings for social share (1), and the title and description will be the same for search results and social platforms, or you can add a different title and description (2).
Alt and title attributes of images
When uploading images to the image gallery, make sure that the file names match what the images represent, e.g., Photo_name_service(company).jpg
Add alt and title attributes to your images uploaded to the gallery:
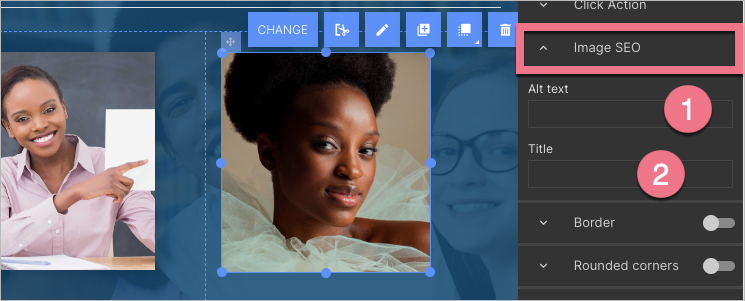
1. Go to the editor, click the image, and unfold the Image SEO tab in the right-side menu.
2. Add alt and title attributes:
- Alternative text (alt attribute) – a text that will be displayed if the image cannot be loaded for some reason.
- Title (title attribute) – a text that appears when you hover the mouse over the image.
Both file names and alt attributes should contain keywords.
3. Publish your project.
Images uploaded to the gallery are automatically optimized for display on websites. We recommend uploading images with a size of approx. 150kB and a maximum resolution of 1920 × 1080 px (for background images).
Headlines in landing page sections
Every landing page should contain unique headlines, especially the main headline marked by the H1 tag. Do not duplicate the same headlines in the following sections, and add keywords if possible.
Add a headline tag:
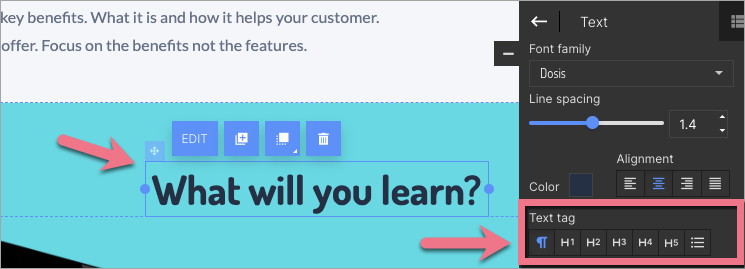
1. Go to the editor of your landing page. Select the text widget you want to tag.
2. In the widget options in the toolbar, choose the text tag H1, H2, or other.
Landing page indexation by search engines
By default, the settings of your landing page allow it to be indexed by search engines.
If you want to learn how to disable indexing, check this guide.