Product

Create, publish and optimize pages with a drag&drop, pixel perfect and mobile-friendly builder

Speed up the creation process with 400+ customizable templates for landing pages, pop-ups and sections

Track microconversions in your Dashboard and analyze events and clicks with visual map

Integrate your pages with your favorite mar-tech apps and solutions to get the flow of your campaign going

Drive sales and conversions with irresistible product displays and seamless shopping experiences

Use a reliable and secure platform that smoothly handles millions of visits

Resources

Master digital marketing with the help from savvy professionals and increase your website’s conversions

Guides for beginners, set-up instructions and creation tips to get started and optimize your pages

A free online course for landing page creators! Learn the secrets of high-converting pages and become an expert

Get the answers you’re looking for – contact us

Schedule a one-on-one meeting with us and learn more about the benefits of our platform

Home Help Center Meta (Facebook) pixel on a pop-up thank you page

Meta (Facebook) pixel on a pop-up thank you page

TABLE OF CONTENT

You can track thank you page of your pop-up using Meta (Facebook) pixel. It allows you to get information about pop-up views.

Before you start the pixel installation, verify your domain on Facebook. Then, integrate your landing page using one of the methods:

NOTE: This integration uses the HTML widget which is not available with the Core plan.

Get Meta pixel URL address

During the general set-up of your Meta pixel (base code), copy the snippet with its URL address. It should look like this: <img height=”1″ width=”1″ style=”display:none” src=”https://www.facebook.com/tr?id=001100&ev=PixelLead&noscript=1%22/ >.

Install the pixel on pop-up

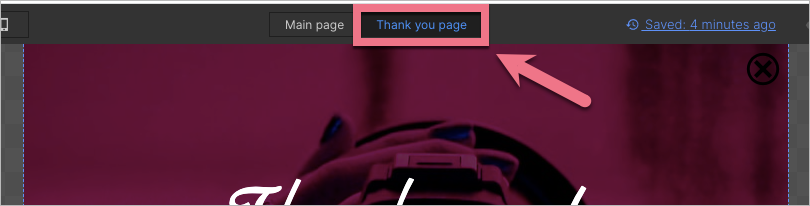
1. Navigate to your pop-up editor and go to a thank you page view.

2. On the left side of the editor, find the HTML widget, then drag and drop it into the active area of your project.

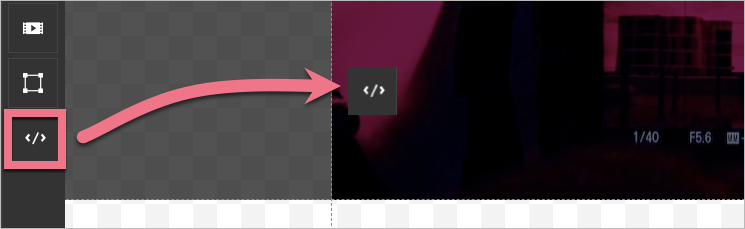
3. Double-click on the widget to start editing.

4. Paste the snippet of the base code. Then Save & close.

5. Publish your pop-up.

NOTE: Keep in mind that Meta (Facebook) is a third-party solution and is continually being developed. We do our best to keep this guide updated, but if you come across any changes in the set-up process, let us know.

Browse all integrations in our Integrations Catalog to see tools you can connect Landingi with.