You can create groups for your landing pages to manage multiple campaigns more easily and smoothly.
How to create a group
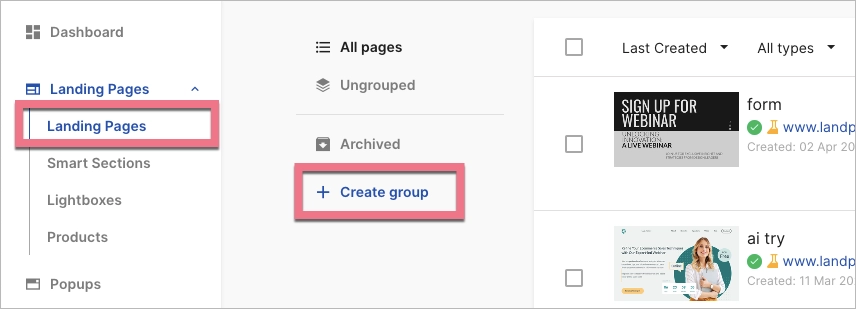
1. Go to the Landing Pages tab.
2. On the left side of the list of your landing pages, click + Create group.
3. Type a name and hit Enter.
4. You can rename or delete a group at any time (deleting a group means deleting the group name label, not landing pages). Click a name to go to the list of landing pages assigned to a group.
How to assign a page to a group
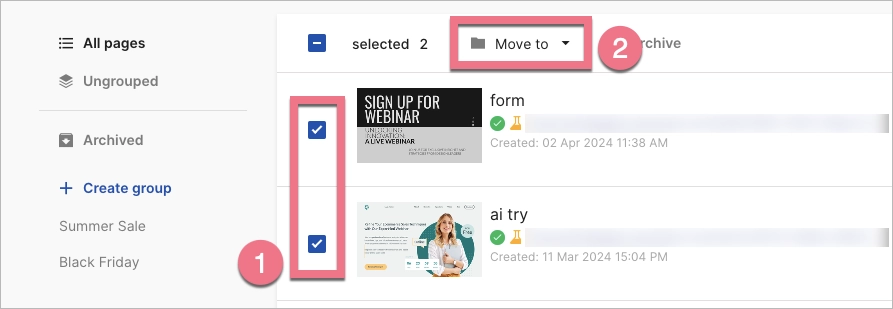
1. Go to the list of all landing pages and check the ones you want to move to the group. Click on Move to. Then select a group from the list.
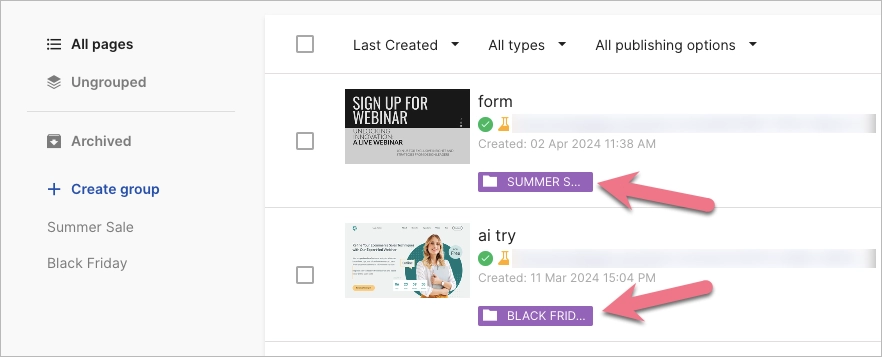
2. Each assigned landing page will be labeled with the group name.
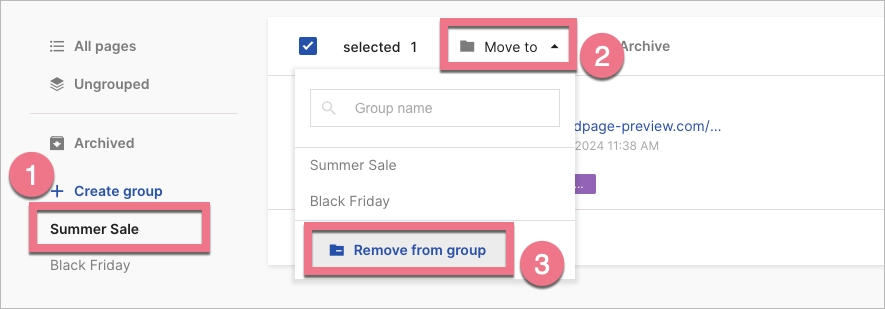
3. To remove a landing page from a group, click on the group name (1) and select the landing page. Then click on Move to (2) and Remove from group (3).