You can integrate your landing page with Facebook to track conversions and manage the analytics. In Landingi, you can do this in three ways:
- integrate via Facebook Pixel,
- integrate via Facebook Conversions API and Zapier,
- integrate via Pixel ID and Conversions API token (in-app integration).
This guide will show you how to set up the in-app integration. This integration collects data about form submissions and sends them to your Facebook Conversions API as a contact event.
NOTE: The pixel and conversions API work only with domains verified with Meta Business Manager.
Get your ID and token
1. Go to Events Manager. You’ll copy the pixel ID and token.
2. You need an active pixel. You can use either Facebook Pixel or Conversions API. If you don’t have any pixels, follow the guide on how to set up a Facebook pixel (follow “Get your conversions API” only). In step 4 of that guide, you can select either Conversions API or Facebook Pixel.
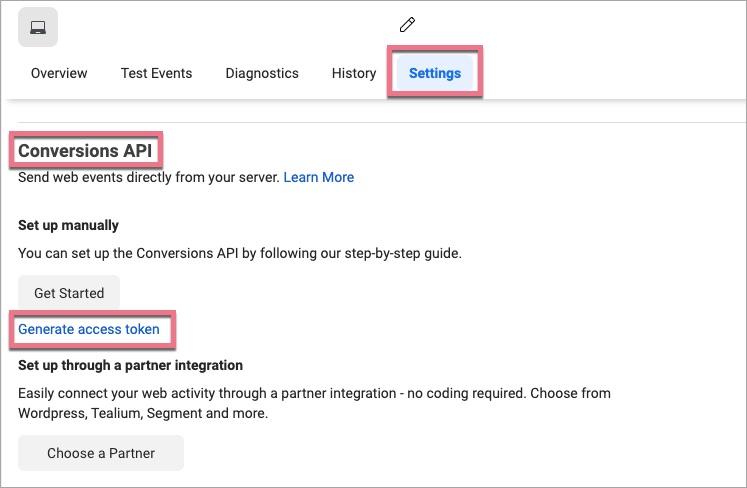
3. To find your pixel ID, go to Data Sources (1) > Settings (2), and copy the ID (3).
4. To copy the token, scroll down the Settings section and find Conversions API. Click on Generate access token and copy it.
NOTE: If the Generate access token isn’t active, or you don’t see it at all, it means that you don’t have the required permissions (administrator or developer).
Set up the integration in Landingi
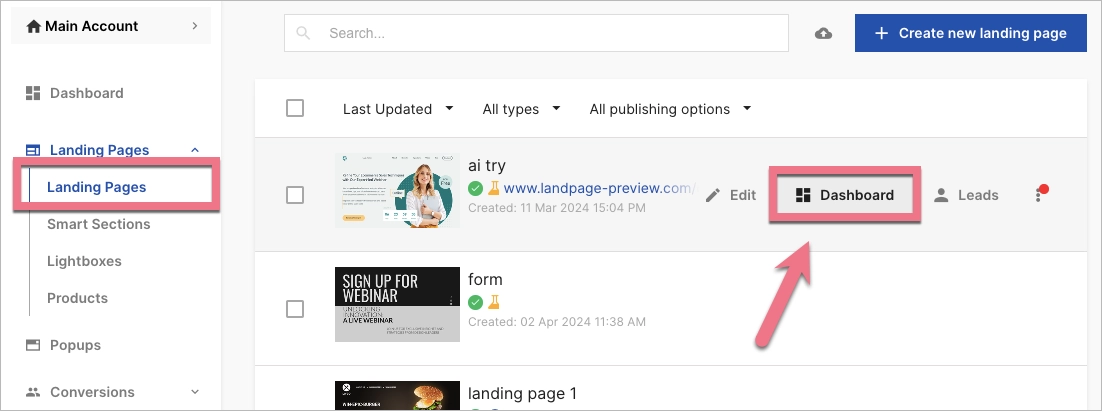
1. Open a new browser tab, log in to Landingi, and navigate to the Dashboard of your landing page. You must set up the integration for each of your landing pages separately.
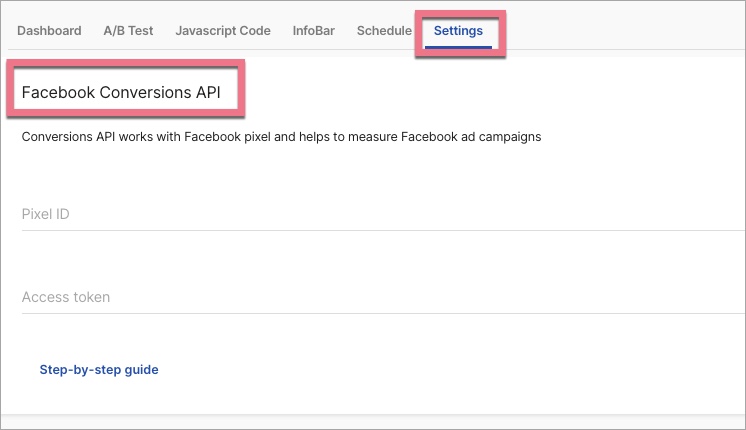
2. Go to Settings, paste the ID and token, and save changes.
3. You’ll see an alert box asking you to trigger a conversion. Go to your landing page published to a domain that you’ve verified with Facebook Business Manager, fill out the form and submit it. Go back to Settings (or refresh the Settings page). If you see a success alert box, it means that your integration has been set up correctly. If the alert box is red, it’s probably because you’ve entered an incorrect ID or token. Check the data and verify the connection again.
Browse all integrations in our Integrations Catalog to see tools you can connect Landingi with.