If you manage your website (outside the Landingi platform) with the help of Google Tag Manager, you can place advanced pop-ups on it by adding the proper code directly in GTM.
Get your pop-up’s HTML code
You can find the pop-up’s HTML code in the pop-up display options. You can enter those options two ways.
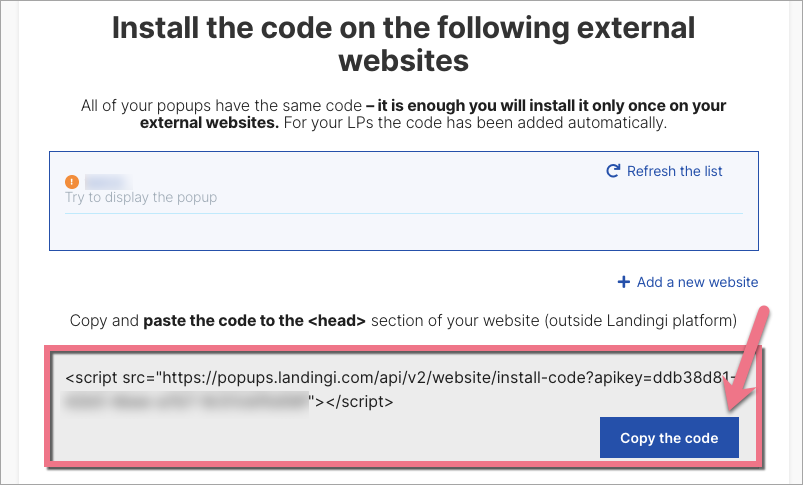
1. When creating a pop-up, after the last step (when you choose to publish your pop-up outside the Landingi platform), you will find a code at the bottom of the page. Click Copy the code.
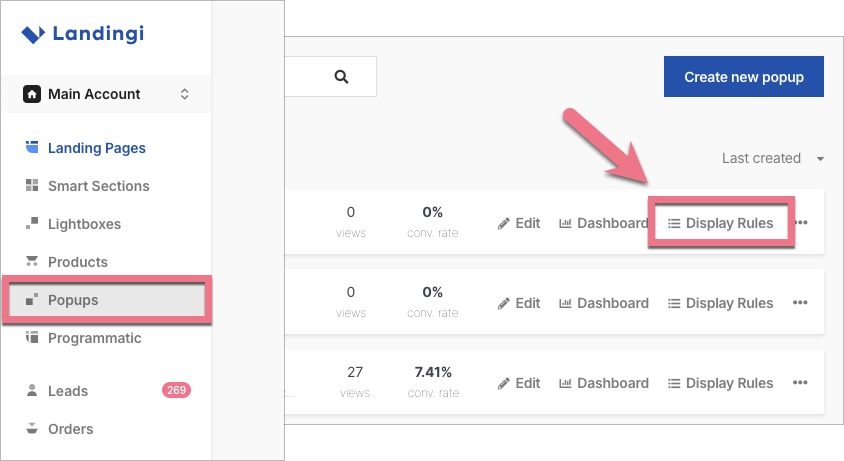
2. You can enter such pop-up options also by clicking Display Rules in the Pop-ups tab.
Add the code to display pop-ups via GTM
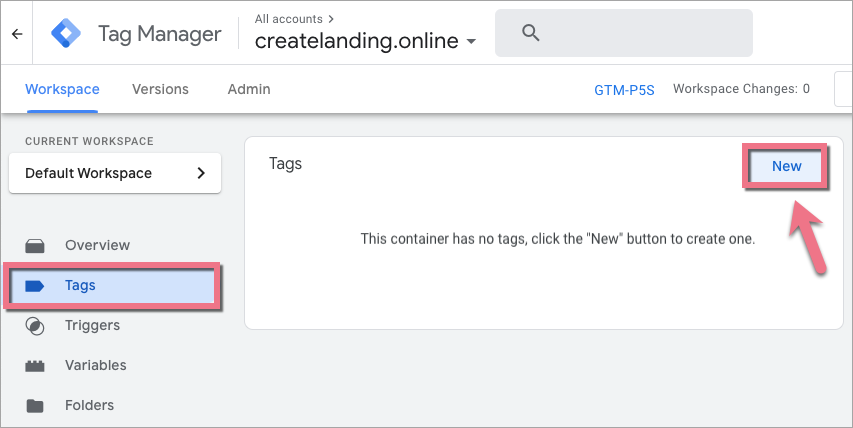
1. Log into your GTM account and go to the Tags tab in the left menu. Add a new tag by clicking the New button.
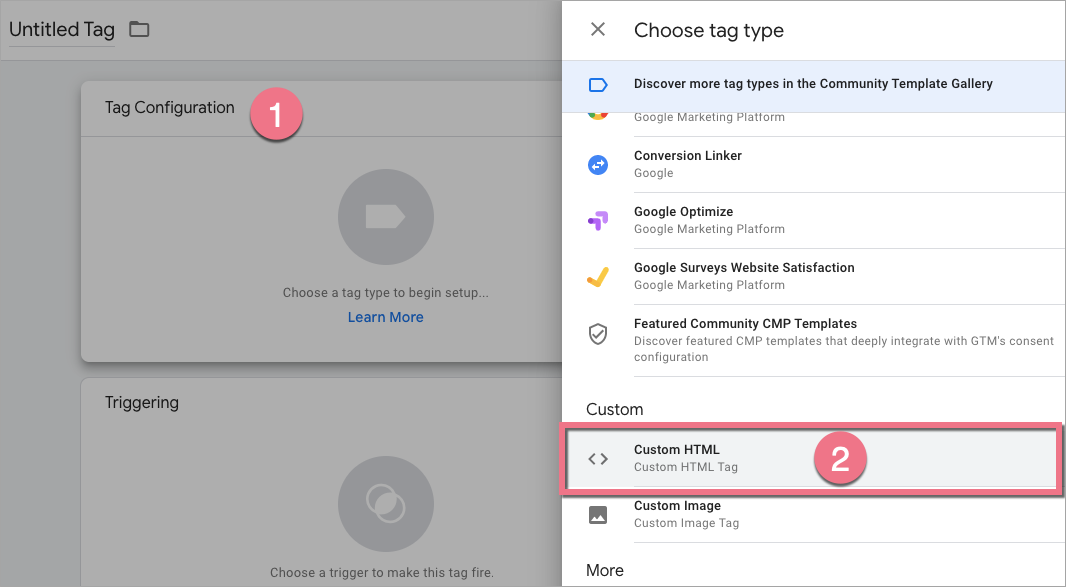
2. Click anywhere in the field Tag Configuration (1), and then select Custom HTML (2) from the menu.
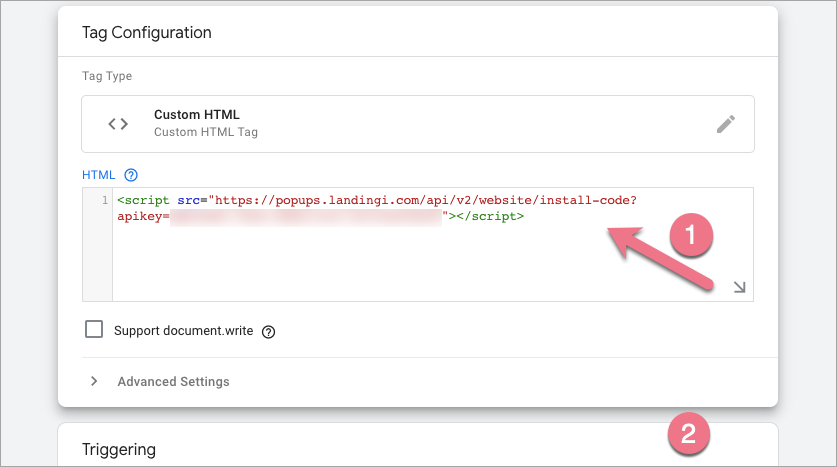
3. In the window that opens, paste the previously generated (in the pop-up display options) code in the HTML field (1).
If you want the pop-up to appear, for example, only on selected subpages, you can use additional rules and set them in the Rules (2) section.
4. Save changes – in this case, the pop-up will be added to the home page and all subpages.
Read more about pop-ups publishing and display rules here.