Lightboxes display as pop-up windows. They fill the screen and dim out the rest of your landing page. To add a lightbox to your landing page, follow the steps below.
Learn how to create a lightbox.
Add a lightbox to your landing page
Log in to your Landingi account and go to the editor of the landing page that you want to place the lightbox on.
Widgets that can trigger a lightbox are:
- Button
- Image
- Icon
- Text
Lightbox triggered by a button
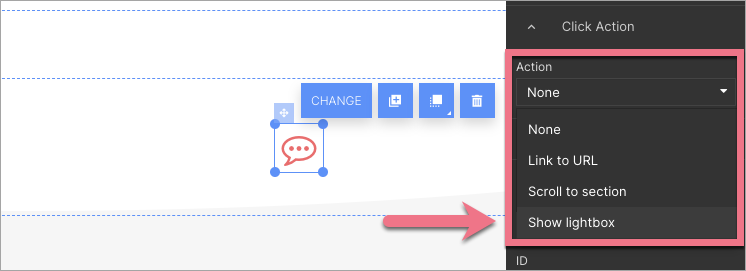
1. Add a Button widget (from the left-side widget bar) that will trigger the lightbox when you click on it. In the right-side toolbar find the Click Action tab and unfold the Action menu.

2. Select Show lightbox (1). Then select the lightbox from the drop-down list (2). You can also create a new lightbox by clicking on +.

3. Publish your landing page and check if the lightbox is displayed correctly.
Lightbox triggered by an icon or an image
1. Add an Icon or Image widget (from the left-side widget bar) that will trigger the lightbox when you click on it.
2. In widget settings in the right-side panel, scroll down, find the Click Action tab, and choose Show lightbox from the drop-down list.

3. Choose your lightbox or create a new one by clicking the + icon.

4. Publish your landing page and check if the lightbox is displayed correctly.
Lightbox triggered by text
1. Add a Text widget (from the left-side widget bar) that will trigger the lightbox when you click on it.
2. Highlight the text you want to be a trigger and click the link icon in the context menu (above the widget).

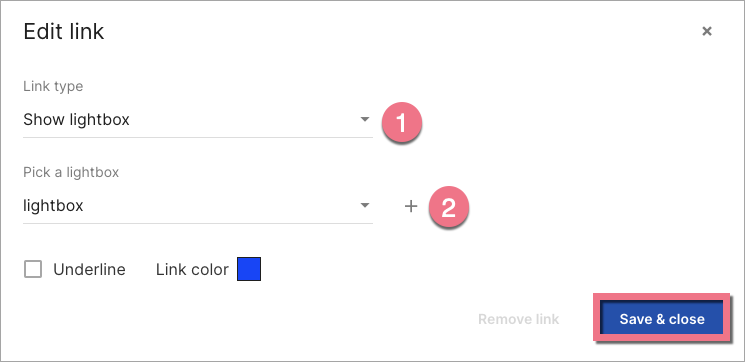
3. From the Link type list, choose Show lightbox (1). Select your lightbox (2) or create a new one by clicking the + icon.
Then Save & close.

4. Publish your landing page and check if the lightbox is displayed correctly.